首頁加入 cookie 使用提醒訊息
你是否會在瀏覽新網站時,看到頁面下方有著「為了增進使用者體驗,本網站使用 cookie 功能儲存...」的提醒訊息呢?這是因應歐盟一般資料保護規範(GDPR)內容所做的通知。簡單來說,不論你的網站是否設置在歐盟國家,只要歐盟居民有使用你的網站功能:即便只是單純瀏覽,都在 GDPR 所定義的保護範圍內。
為了讓瀏覽者更清楚知道網站會使用的瀏覽器功能,我會在這段提醒訊息中加上網站的服務條款及隱私權政策連結,以下是參考網站文章〈在網頁底部顯示 Cookie 同意欄位〉後的實做。
- 下載範例後將
grt-cookie-consent.js放到/public/js資料夾;grt-cookies-consent.css放到/public/css資料夾。 - 在
/resoureces/views/layouts/master.blade.php引入 CSS 檔案段落處引入 cookie 使用提醒訊息的 CSS 樣式檔:
<!-- 同意 Cookie 存取 -->
    <link rel="stylesheet" href="{{ asset('css/grt-cookies-consent.css') }}" type="text/css" media="all" />
- 在
/resoureces/views/layouts/master.blade.php引入 JavaScript 檔案段落前填寫 cookie 使用提醒訊息:
<!-- 同意 Cookie 存取 -->
    <div class="grt-cookie">
        <div class="grt-cookies-msg">
            <p>本網站使用 cookie 功能增進網站使用體驗,如果你繼續使用本網站將認定接受並理解本網站的隱私權政策和服務條款。 <a href="/privacy-policy">隱私權政策</a> <a href="/terms">服務條款</a>
            </p>
        </div>
        <span class="grt-cookie-button">瞭解</span>
    </div>
- 在引入 JavaScript 檔案段落加上以下內容:
 <!-- 同意 Cookie 存取 -->
    <script src="{{ asset('js/grt-cookie-consent.js') }}"></script>

    <script>
        // Start the plugin with defalt settings
        // $(".grt-cookies").grtCookie();

        // Custom Settings
        $(".grt-cookie").grtCookie({
            // Main text and background color
            textcolor: "#222222",
            background: "#a2cce3",
            // Button colors
            buttonbackground: "#4fa6d5",
            buttontextcolor: "#fff",
            // Duration in days
            duration: 365,
        });
    </script>

當瀏覽者點選「瞭解」後 cookie 的保留時間為 365 日,也就是說從點選後的一年內都不會再出現。
在前台刪除回應
如果要刪除瀏覽者回應訊息,目前的作法是在 Voyager 的 BREAD 頁面操作,難道不能在前台刪回應嗎?當然可以,就是再寫程式囉。以下是在前台刪除回應的構想流程,確認後進行實做:
- 在前台建立登入頁面讓管理者登入網站。
- 登入後產生 Session,從 role_id 欄位(安裝 Voyager 時於 users 資料表增加)判斷登入者是否具備管理者資格。
- 在登入者具備管理者資格的情況下留言者名稱旁會出現「刪除」連結,點選後會出現對話框,提醒是否真的要進行刪除作業。
- 執行刪除作業後用 redirect 函式回到頁面。
在前台建立登入頁面讓管理者登入網站
建立負責使用者登入及登出的 Controller:UserController
php artisan make:controller UserController
在 Controller 中填寫登入及登出作業的方法:
<?php
// /app/Http/Controllers/UserController.php

namespace App\Http\Controllers;

use Illuminate\Http\Request;
use Illuminate\Support\Facades\Validator;
use App\Models\User;
use Illuminate\Support\Facades\Hash;

class UserController extends Controller
{
        // 登入作業
    public function logInPage(){
        $binding = [
            'title' => '登入',
        ];
        return view('auth.login', $binding);
    }

    // 登入處理
    public function logInProcess(){
        // 接收登入資料
        $input = request()->all();

        // 驗證規則
        $rules = [
            'email' => ['required', 'max:150', 'email'], //電子郵件
            'password' => ['required', 'min:6'], //密碼
        ];
        // 驗證資料
        $validator = Validator::make($input, $rules);
        // 資料驗證錯誤時的處理
        if ($validator->fails()){
            return redirect('/auth/login')
            ->withErrors($validator)
            ->withInput();
        }

        // 獲取使用者資料
        $User = User::where('email', $input['email'])->firstOrFail();

        // 檢查登入密碼
        $is_password_correct = Hash::check($input['password'], $User->password);
        // 密碼錯誤回傳訊息
        if(!$is_password_correct){
            $error_message = [
                'msg' => '密碼錯誤',
            ];
            return redirect('/auth/login')->withErrors($error_message)->withInput();
        }
        // 記錄會員 session 編號
        session()->put('role_id', $User->role_id);

        // 會員登入後重新導向至登入前畫面,如果沒有則重新導向至首頁
        return redirect('/');
    }

    public function logOut(){
        //清除 session
        session()->forget('role_id');
        //重新導向至首頁
        return redirect('/');
    }

}
建立登入頁面的 Blade template 檔案:
// /resources/views/auth/login.blade.php

<!-- 繼承主版 -->
@extends('layouts.master')
@section('meta_description', '管理者登入頁面')
@section('title', '管理者登入頁面')
@section('content')

<!-- 主要內容 -->
@section('content')

<section id="blog" class="blog">
    <div class="container">
        <div class="row">
            <div class="col-lg-12 entries">
                <article class="entry entry-single">
                    <div class="entry-content">
                        <!-- 錯誤訊息顯示 -->
                        @include('auth.validationErrorMessage')
                        <form action="/auth/login" method="POST" class="reply-form">
                            @csrf
                            <div class="row">
                                <div class="form-group">
                                    <label>你的電郵:
                                        <input type="text" name="email" value="{{ old('email') }}" class="form-control">
                                    </label><br />
                                </div>
                            </div>
                            <div class="row">
                                <div class="form-group">
                                    <label>你的密碼:
                                        <input type="password" name="password" class="form-control">
                                    </label><br />
                                </div>
                            </div>
                            <button type="submit" class="btn btn-primary">登入</button>
                        </form>
                    </div>
                </article>
            </div><!-- End blog entries list -->
        </div><!-- End blog sidebar -->
    </div>
</section>
@stop
在 /routes/web.php 填寫登入登出的路由:
//前台登入
Route::group(['prefix' => 'auth'], function(){
    //登入
    Route::get('/login', 'App\Http\Controllers\UserController@logInPage')->name('login');
    //登入處理
    Route::post('/login', 'App\Http\Controllers\UserController@logInProcess');
    //登出
    Route::get('/logout', 'App\Http\Controllers\UserController@logOut')->name('logout');
});

回應留言者名字旁的「刪除」連結
透過檢查 session 的 role_id 欄位值是否為 1(admin)決定是否顯示刪除連結,在 Blade template 檔案的相關程式碼段落如下:
@if($with_comment->website != '')
<h5><a href="{{ $with_comment->website }}" target="_blank">{{ $with_comment->name }}</a>
@if(session()->has('role_id') && session('role_id') == 1)
<a href="/comment/{{ $with_comment->id }}" onClick="return confirm('確定要刪除嗎?')">刪除</a>
@endif
</h5>
@else
<h5>{{ $with_comment->name }}
@if(session()->has('role_id') && session('role_id') == 1)
<a href="/comment/{{ $with_comment->id }}" onClick="return confirm('確定要刪除嗎?')">刪除</a>
@endif
</h5>
@endif
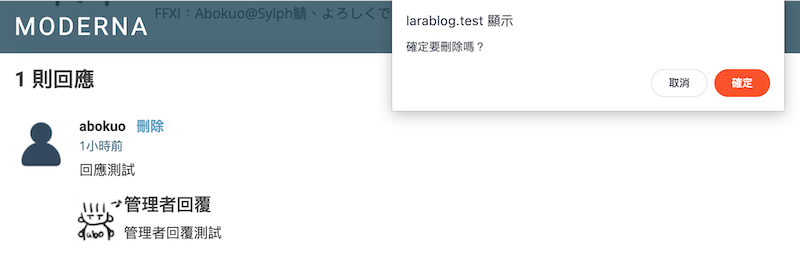
回應刪除作業
在 CommentController 中撰寫刪除回應的方法:
public function deleteComment(Request $request){
        $comment = Comment::findOrFail($request->id);
        $comment->delete();
        return redirect()->back();
    }
在 /routes/web.php 填寫刪除回應的路由:
Route::get('/comment/{id}', 'App\Http\Controllers\CommentController@deleteComment');
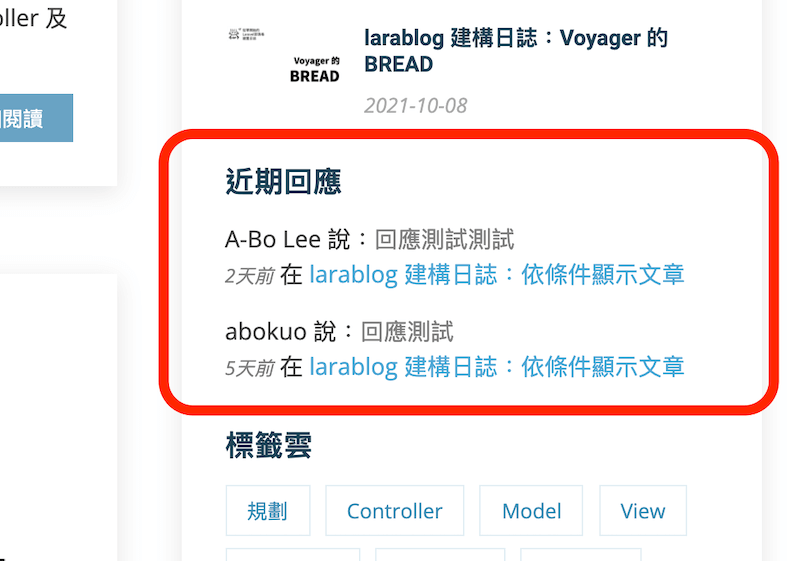
近期回應
網站側邊欄陳列著輔助瀏覽者使用的各項小工具:文章目次、搜尋列、近期文章、分類列表、標籤雲...好像沒有近期文章列表?既然沒有就趕快來做。
Controller 改動
在 PostController 各方法的 $bindings 陣列中加上 recent_commnets 變數:取距今最近的五則回應記錄。
'recent_comments' => Comment::orderBy('created_at', 'desc')->limit(5)->get(),
Blade template 改動
有列出側邊欄小工具的 Blade template 檔案,在標籤雲的上方加入近期回應顯示:
<!-- 近期回應 -->
@include('widgets.recent_comments')
<!-- 近期回應 -->
建立 /resources/views/widgets/recent_comments.blade.php:顯示留言人名字、留言內容(取前 50 字)、發表時間及關聯文章名稱(帶連結,點選後前往文章的回應區塊)。
<h3 class="sidebar-title">近期回應</h3>
<div class="sidebar-item recent-posts">
@foreach($recent_comments as $recent_comment)
<div class="post-item clearfix">
{{ $recent_comment->name }} 說:<font color="grey">{!! substr($recent_comment->comment, 0, 50) !!}</font><br />
<i><font size="-1" color="grey">{{ $recent_comment->created_at->diffForHumans() }}</font></i>
在 <a href="/blog/{{ $recent_comment->post->slug }}#comments">{{ $recent_comment->post->title }}</a>
</div>
@endforeach
</div>
透過 Voyager 增加自定義顯示參數
點選 Voyager 選單最下方的「設定」項目後你會看到數個可馬上使用的顯示參數,填寫完後可以在 Blade template 中套用。畫面最下方是添加新設定的表單,你可以依自己需要在前端(Site)或 Voyager(Admin)增加顯示項目。
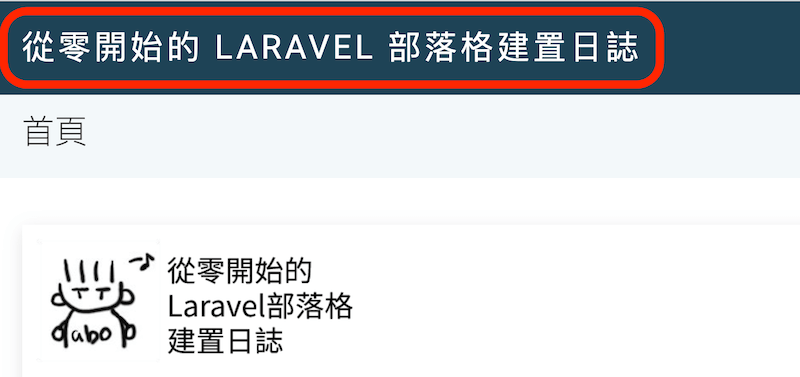
舉例來說,我在「網站標題」欄位填上內容後保存設定,接著編輯 /resources/views/layouts/header.blade.php,將
<h1 class="text-light"><a href="index.html"><span>Moderna</span></a></h1>
改成
<h1 class="text-light"><a href="{{ route('home') }}"><span>{{ setting('site.title') }}</span></a></h1>
前端的網站名稱就變成我指定的名稱了。
以相同流程我可以將內容變動頻率較大,或是不同網站都會使用到的共通項目(像是電話、住址等)透過「新增屬性參數」的方式加在 Blade template 或是 Voyager 中,對網頁設計公司來說很實用。
結語
專案建置至此,不僅將原有 Moderna 的範例資料更改成 Laravel 控制,同時還增加了增進使用者體驗(cookie 使用需知應該不算)的小工具。
尚未落實的網站功能就剩下「網站搜尋」這項,會以什麼樣的方式呈現呢?真令人期待。
居住在臺灣的 Joomler,期望以程式設計、開放原碼推廣活動收入養活一家老小。
35 歲後改姓李,id 作為曾為郭姓的證明。
FFXI:Abokuo@Sylph鯖、よろしくです。

